

- Resource Settings — applies Image Stack to all requests for that resource. Use this only when the origin serves static image assets exclusively. For mixed-content origins, enabling it resource-wide causes conflicts with the Rewrite option.
- Rules — applies Image Stack to requests matching a specific URL pattern. This is the recommended approach for most resources.
1
Open the CDN resource Rules tab
Open the settings of the required CDN resource and go to Rules. Click Create rule and select Image optimization from the template list.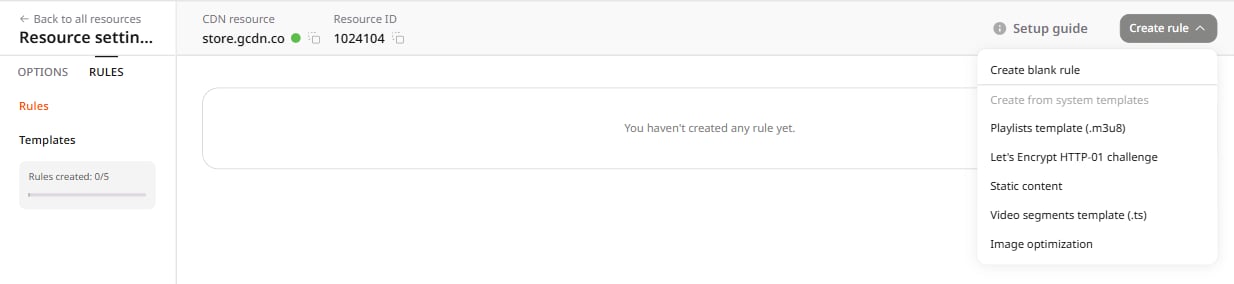
/.*\.(jpg|jpeg|png) pre-filled, which targets all JPG and PNG image requests.2
Configure the Image Stack section
In the Options section, find the Image Stack card and enable the Enable Image Stack checkbox.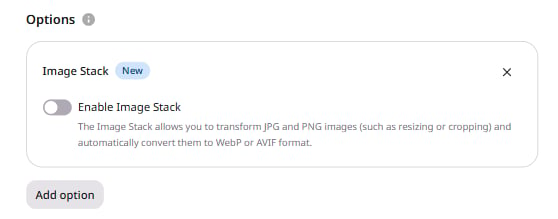
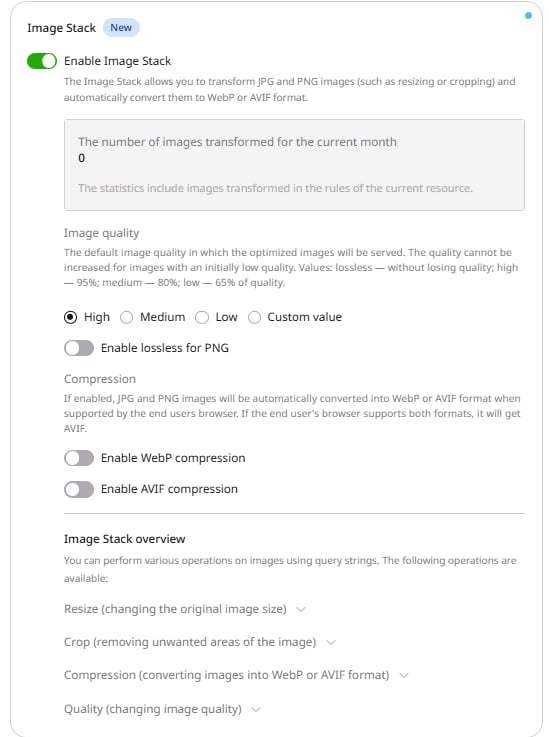
- High: 95%
- Medium: 80%
- Low: 65%
- Custom value: 0–100%
The quality setting cannot run independently. Enable at least one other option — Compression, Resize, or Crop — alongside Image quality. To set quality per individual image, add the
quality query parameter to the image URL. For example: https://image.example.com/image.jpg?fmt=avif&quality=50fmt query parameter to the image URL:3
Save the rule
Click Create rule to save changes. Image Stack becomes active within 5–10 minutes.
When a rule with Image Stack is saved, the resource cache clears automatically and CDN servers begin requesting content from the origin. To prevent origin overload during this period, consider enabling Origin Shielding first or scheduling the change during low-traffic hours.