Files cannot be stored in CDN servers’ cache indefinitely. The CDN caching feature controls how long files from an origin server are stored in the CDN server’s cache. When users request these files, they are served from cache without additional requests to the origin, reducing delivery time, costs, and origin server load.
Files users have not requested within 36 hours will be removed from the CDN servers’ cache, regardless of the feature settings.
When the specified timespan for storing files in the cache has expired, CDN servers send requests to the origin to compare the HTTP ETag header and determine if the files have changed. If the values of the ETag header for previous and current versions do not match, CDN servers load a new version and cache it for the time specified in the feature. If the values match, the storage time of the file in the cache is extended for the specified time.

Configure CDN caching

The CDN caching feature has two options: Origin controlled (enabled by default) and CDN controlled. Select one to set the caching time either in the origin server’s HTTP Cache-Control header or in the CDN settings.

Origin controlled

Set the Cache-Control header on the origin server, then configure the fallback cache expiry in the portal. 1. Depending on the web server (Apache or Nginx), add the Cache-Control header with the max-age and public parameters to the .htaccess (for Apache) or nginx.conf (for Nginx) file. The following Apache configuration caches .gif and .ico files (the public parameter) for 4 days (max-age=345600 in seconds):
The following Nginx configuration caches all ico, css, js, gif, jpeg, and png files (the public parameter) for about 1 day (max-age=88000 in seconds):
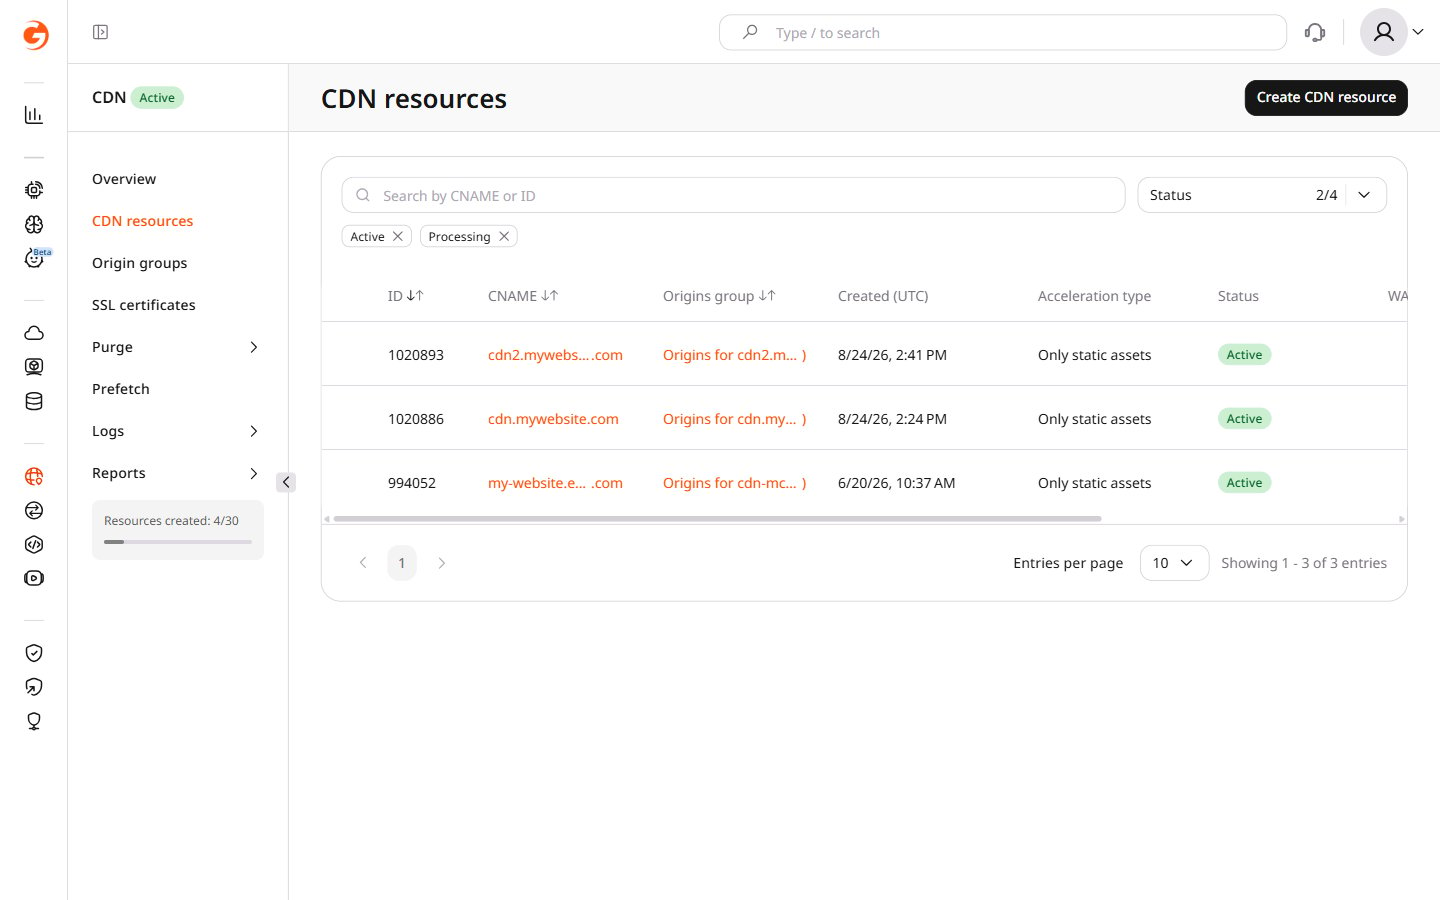
2. In the Gcore Customer Portal, navigate to CDN > CDN resources and click the CNAME of the resource where the Cache-Control header is configured.
CDN resources list page
3. Navigate to Cache > CDN caching. 4. Confirm that Origin controlled is selected in the dropdown. 5. Specify the timespan in the Default cache expiry field. Select a predefined value from the list or select Custom value and enter the time in seconds. This value is used as a fallback when the origin does not send caching HTTP headers.
For Origin controlled mode, CDN servers cache responses with codes 200, 201, 204, 206, 301, 302, 303, 304, 307, and 308. Responses with other codes are not cached.
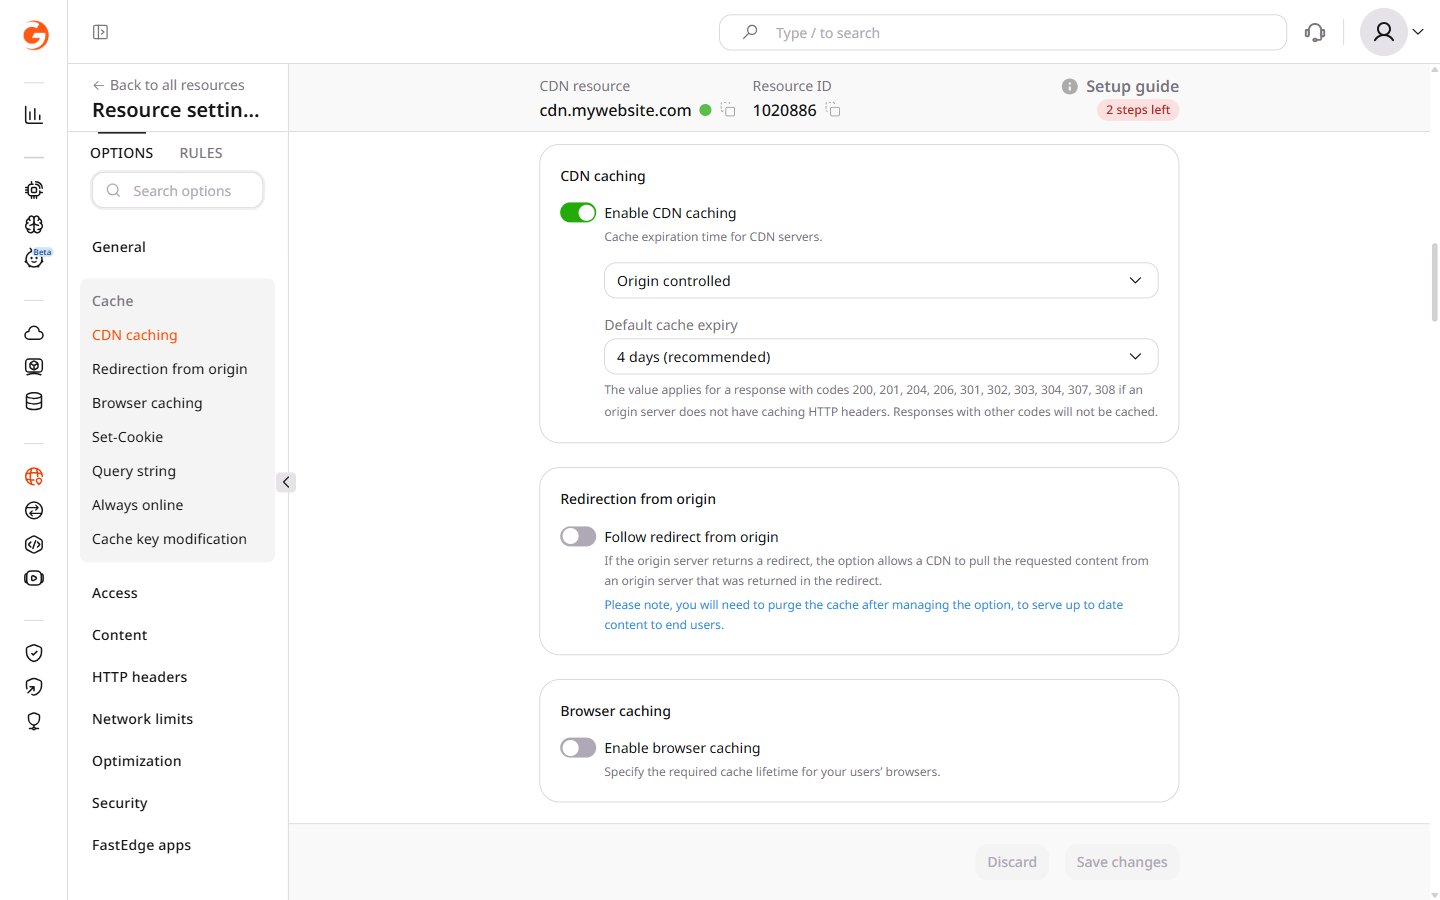
CDN caching settings with Origin controlled selected
6. Click Save changes.

CDN controlled

CDN caching can be configured at two levels:
  • For the whole resource
  • At the advanced caching rule level in the resource
These settings are independent — CDN caching can be set to Do not cache in the main settings while enabled in an advanced rule, and vice versa.
CDN caching applies only to responses with status codes 200, 206, 301, and 302. Responses with 4xx and 5xx status codes are not cached by default. To cache 404 or other non-default status codes, configure an advanced caching rule under the Enable CDN caching via advanced caching rules tab below.
1. In the Customer Portal, navigate to CDN > CDN resources.2. Click the CNAME of the required resource to open its settings.
CDN resources list page
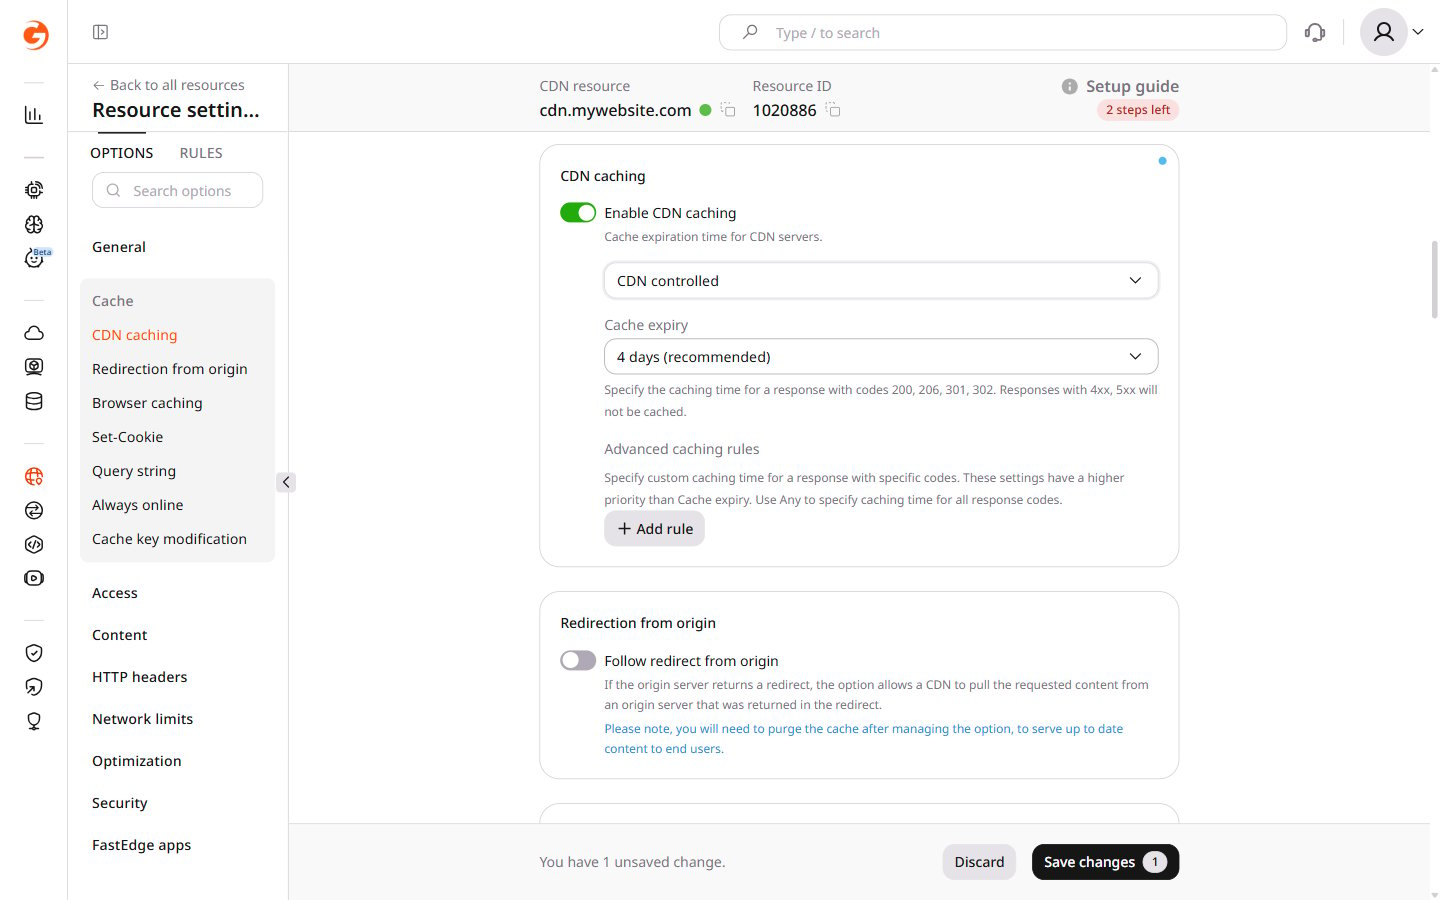
3. Navigate to Cache > CDN caching.4. Confirm the Enable CDN caching toggle is enabled. If not, click the toggle to enable it.5. Select CDN controlled from the dropdown.
CDN caching settings with CDN controlled selected
6. Specify the caching timespan in the Cache expiry field. Select a predefined value from the list or select Custom value and enter a time in seconds.Note that this caching time applies to response codes 200, 206, 301, and 302. Responses with 4xx and 5xx are not cached.
If the Do not cache option is selected, caching is disabled even when the Enable CDN caching toggle is enabled.
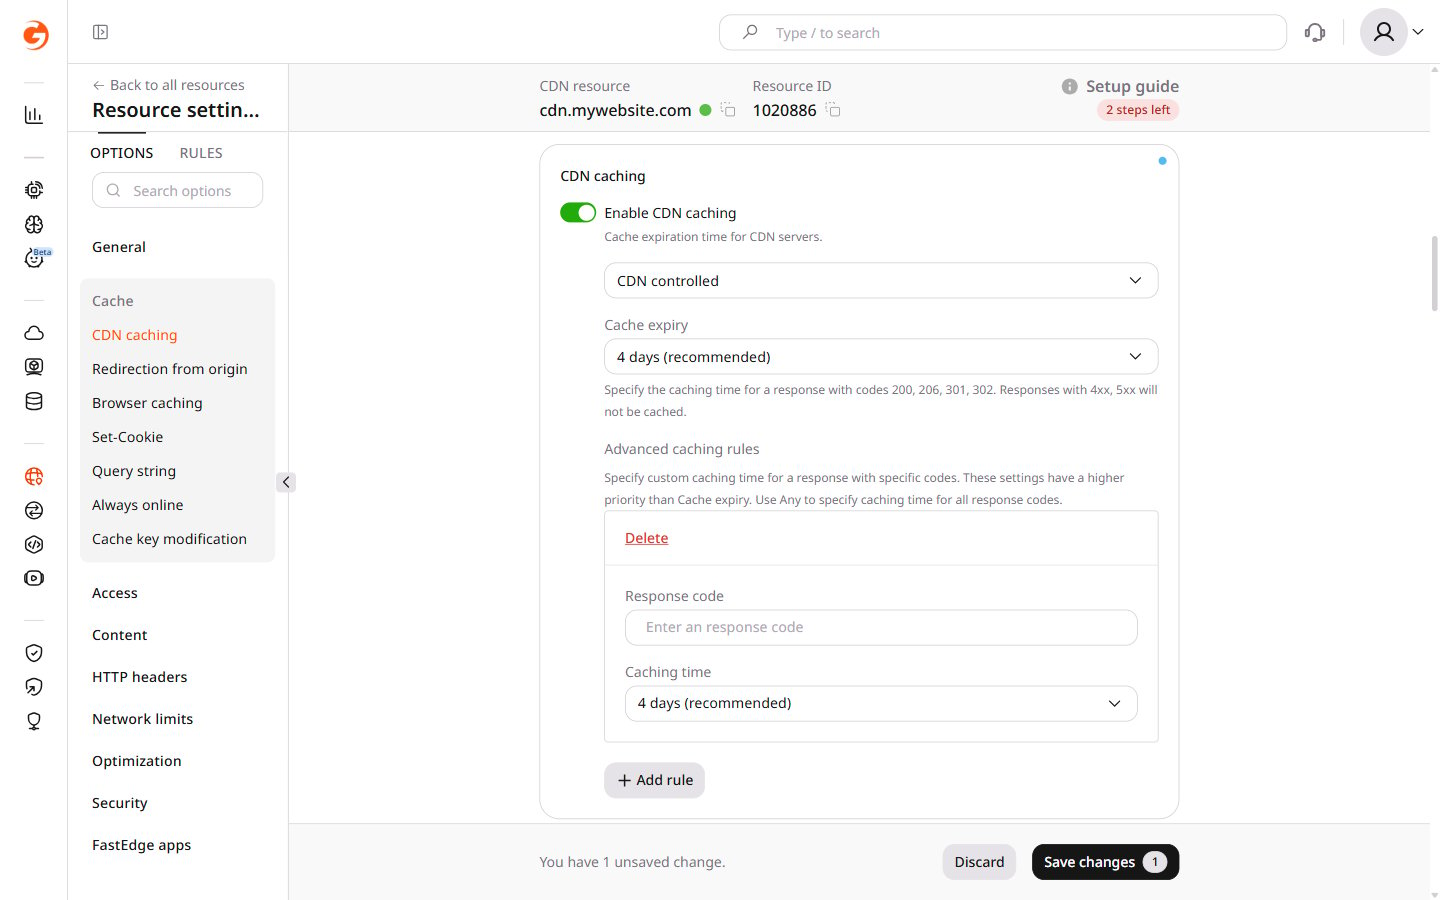
7. (Optional) Configure advanced caching rules for different caching times by response code.8. Click Save changes.

Check CDN caching settings

To verify that CDN caching is working correctly, inspect HTTP response headers using cURL or browser DevTools.

Check through cURL

Run a cURL request against a CDN-delivered URL and inspect the HTTP response headers. 1. Open a terminal (macOS) or command prompt (Windows). 2. Run the following command:
where http://cdn.testdomain.com/css/style.css is the URL of a file delivered via CDN. The output includes HTTP response headers. The headers relevant for diagnosing cache behavior are described in the caching HTTP headers section.
For content caching issues, verify the origin settings or contact Gcore Support.

Check with DevTools in a browser

Use browser DevTools to inspect the HTTP response headers for a CDN-delivered file. 1. Open a web browser. 2. Navigate to the website. 3. Right-click and select Inspect to open DevTools. 4. Select the Network tab. 5. Refresh the page. 6. Select any file from the list that is delivered via CDN. 7. On the Headers tab, review the response headers. The key cache-related headers are described in the section below.
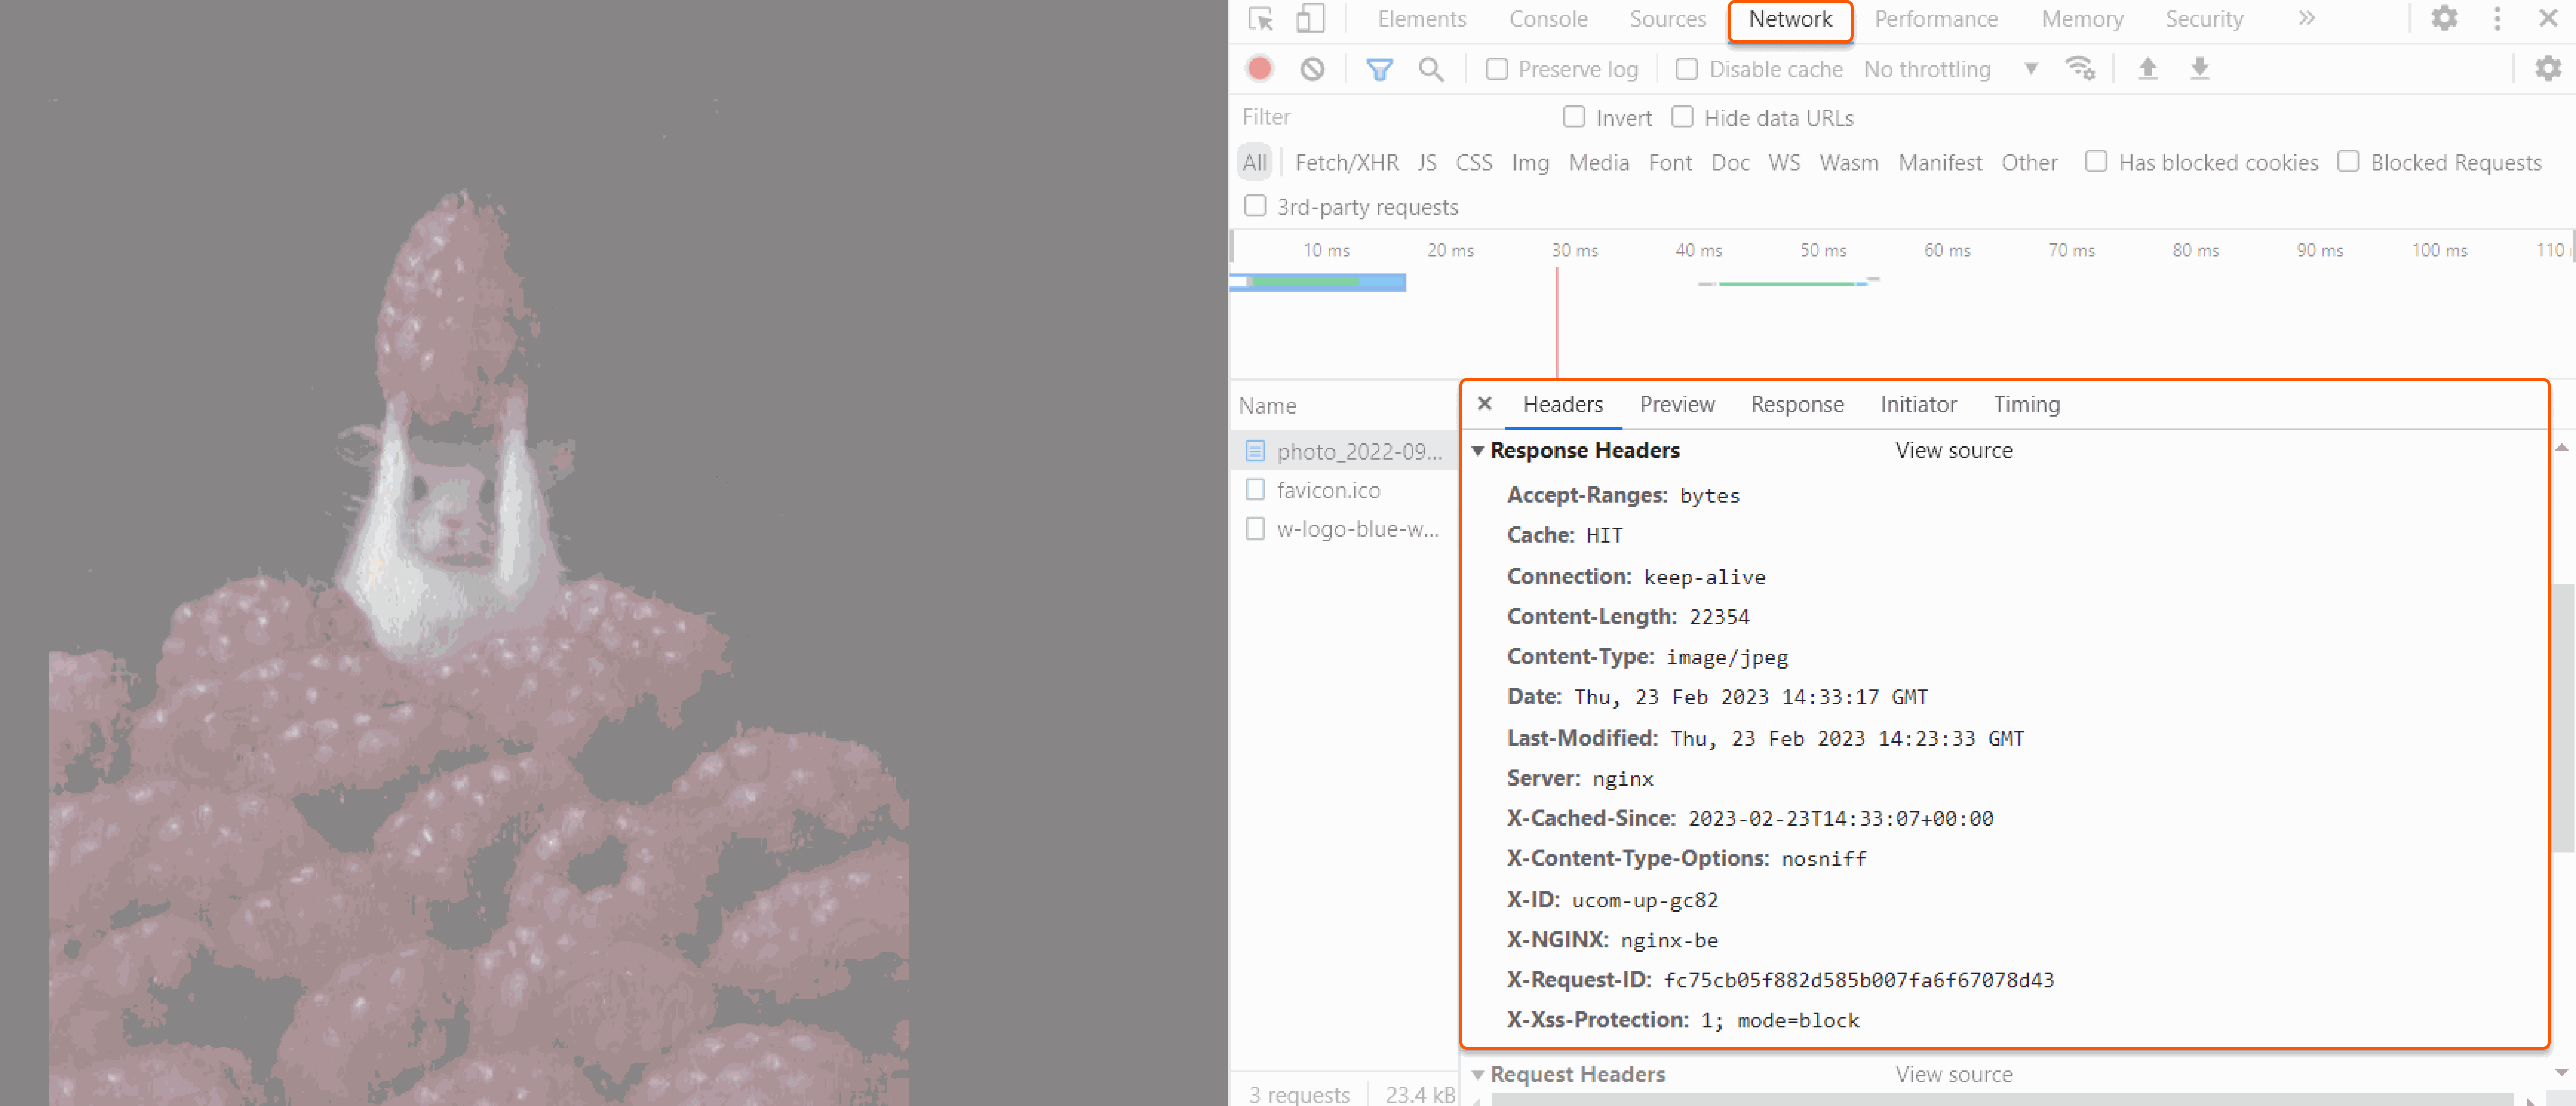
Browser DevTools Network tab showing response headers

Check caching HTTP headers

There are several HTTP header parameters that help analyze the state of the cache:

Video cache recommendations

Video files, VOD or Live, need different cache lifetimes by file type. Cache segments and single-file MP4 content longer, while keeping manifests short so players receive fresh live and playlist updates. For video-specific values, apply the caching rules used when creating a CDN resource for video streaming. They include recommended TTLs for MP4, HLS, MPEG-DASH, live manifests, and segment files.