Configuration steps
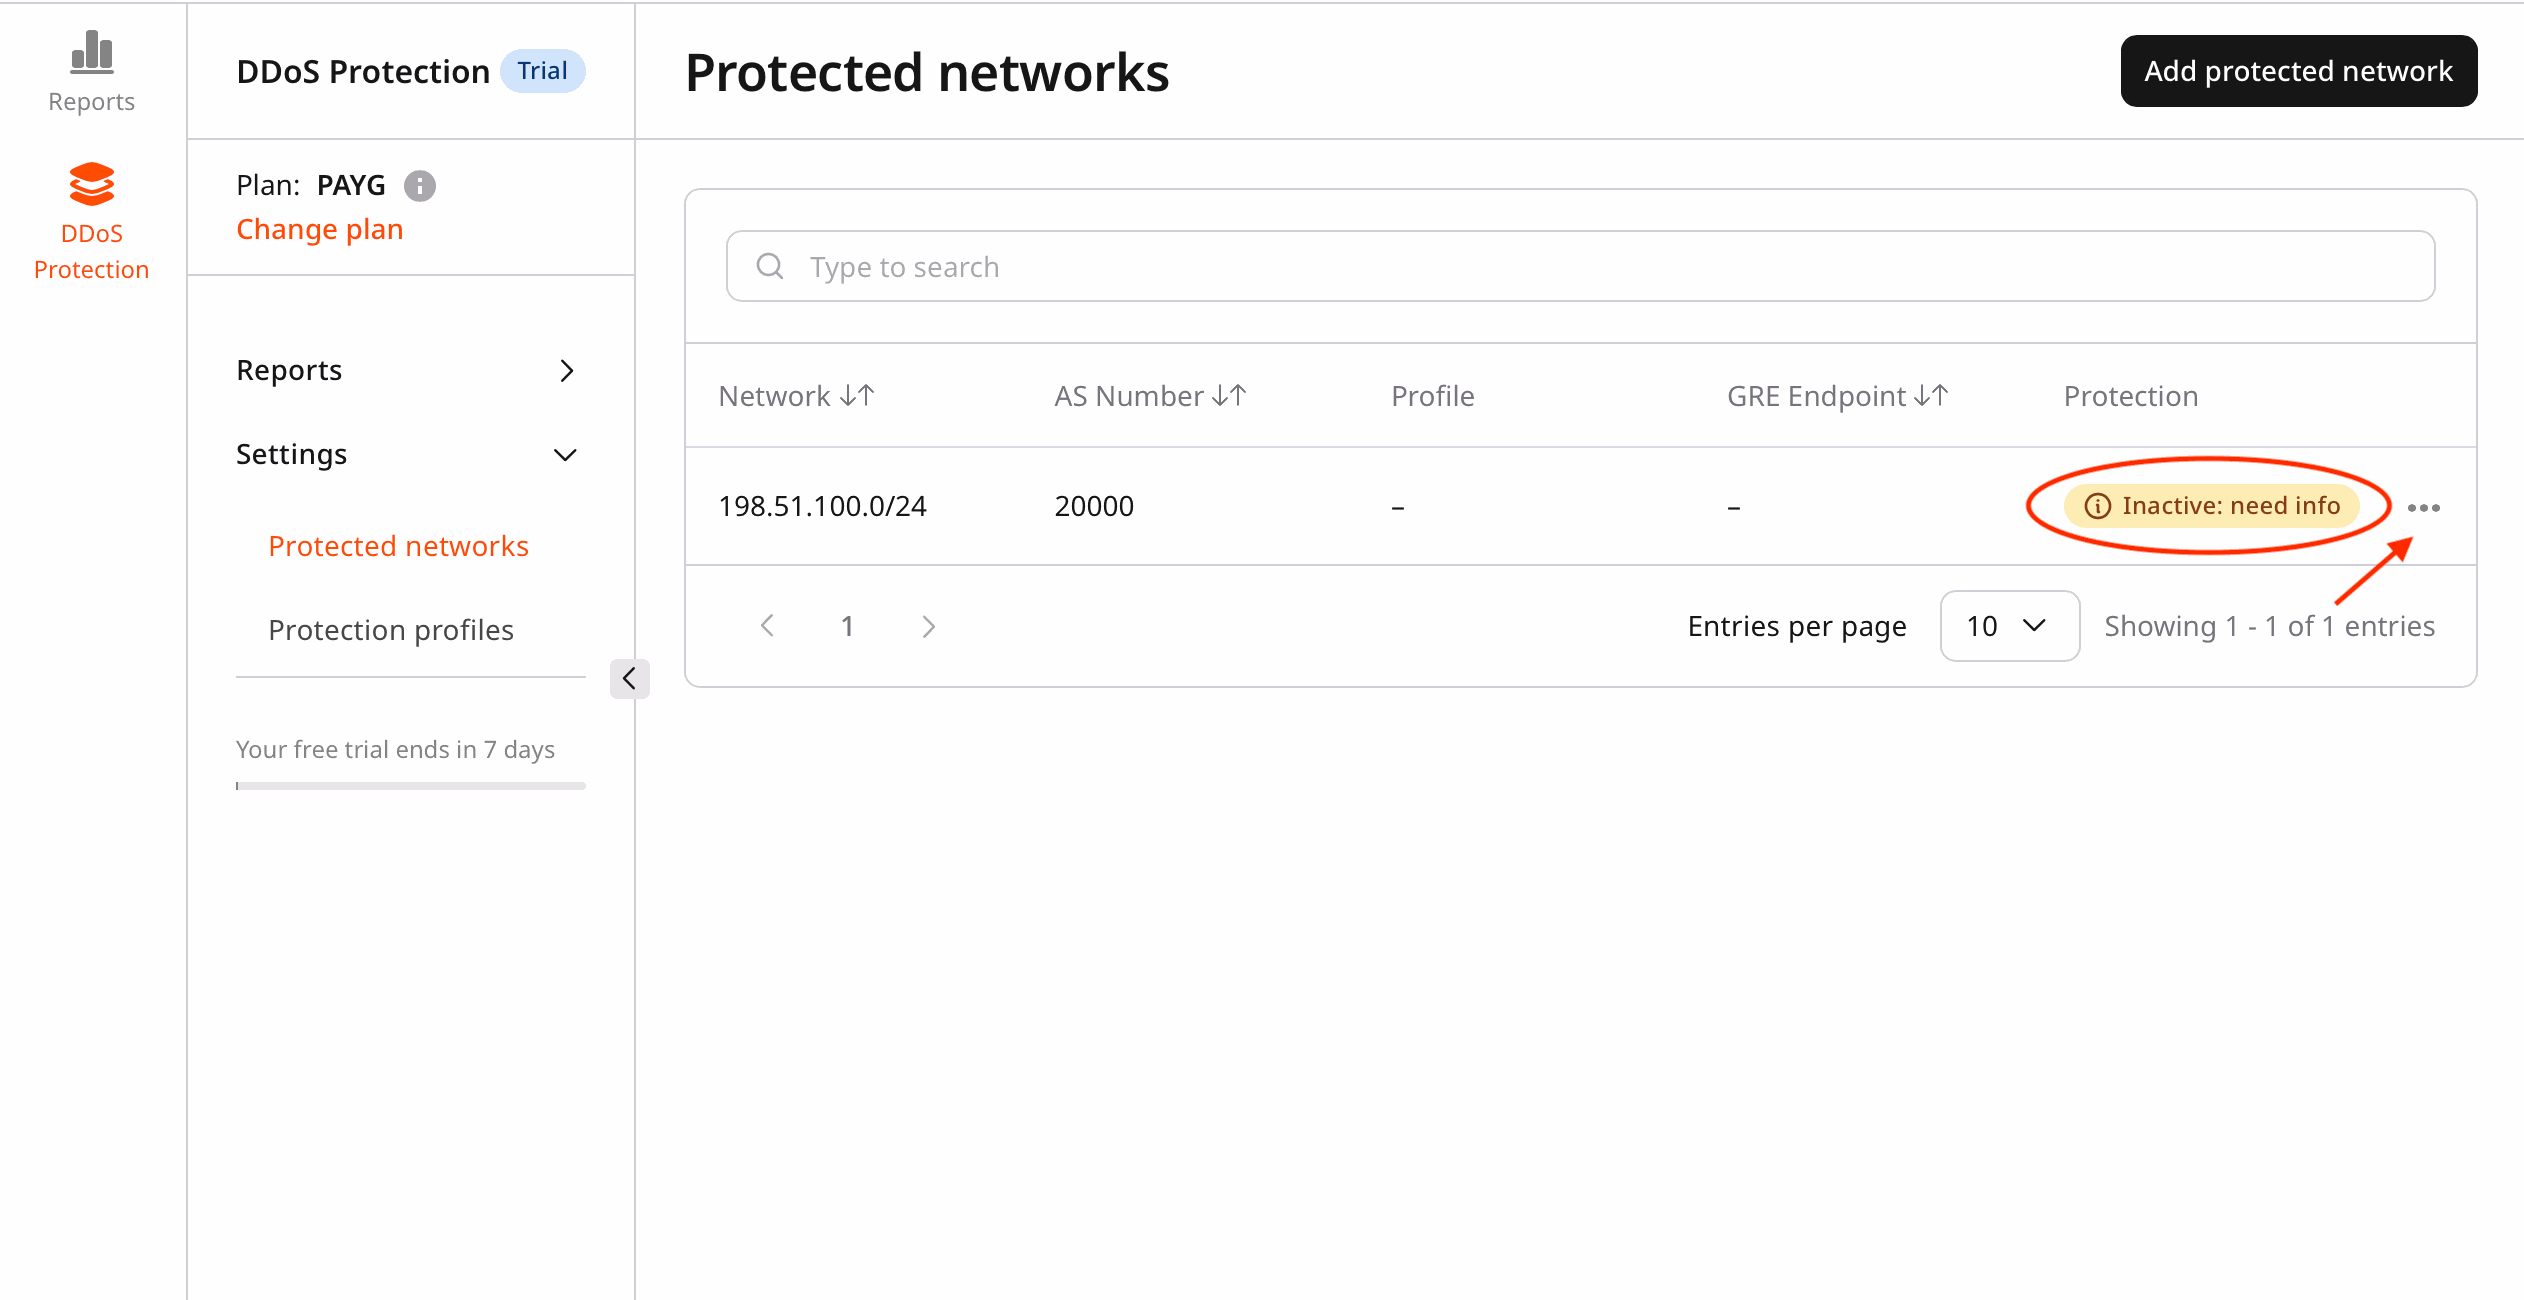
Complete the following steps in the Gcore Customer Portal to configure an approved network.- Navigate to DDoS Protection > Protected networks.
-
Locate the approved network.
- Find the network with the Inactive: need info status.
- Click the … (three dots) menu next to the network and select Edit.
-
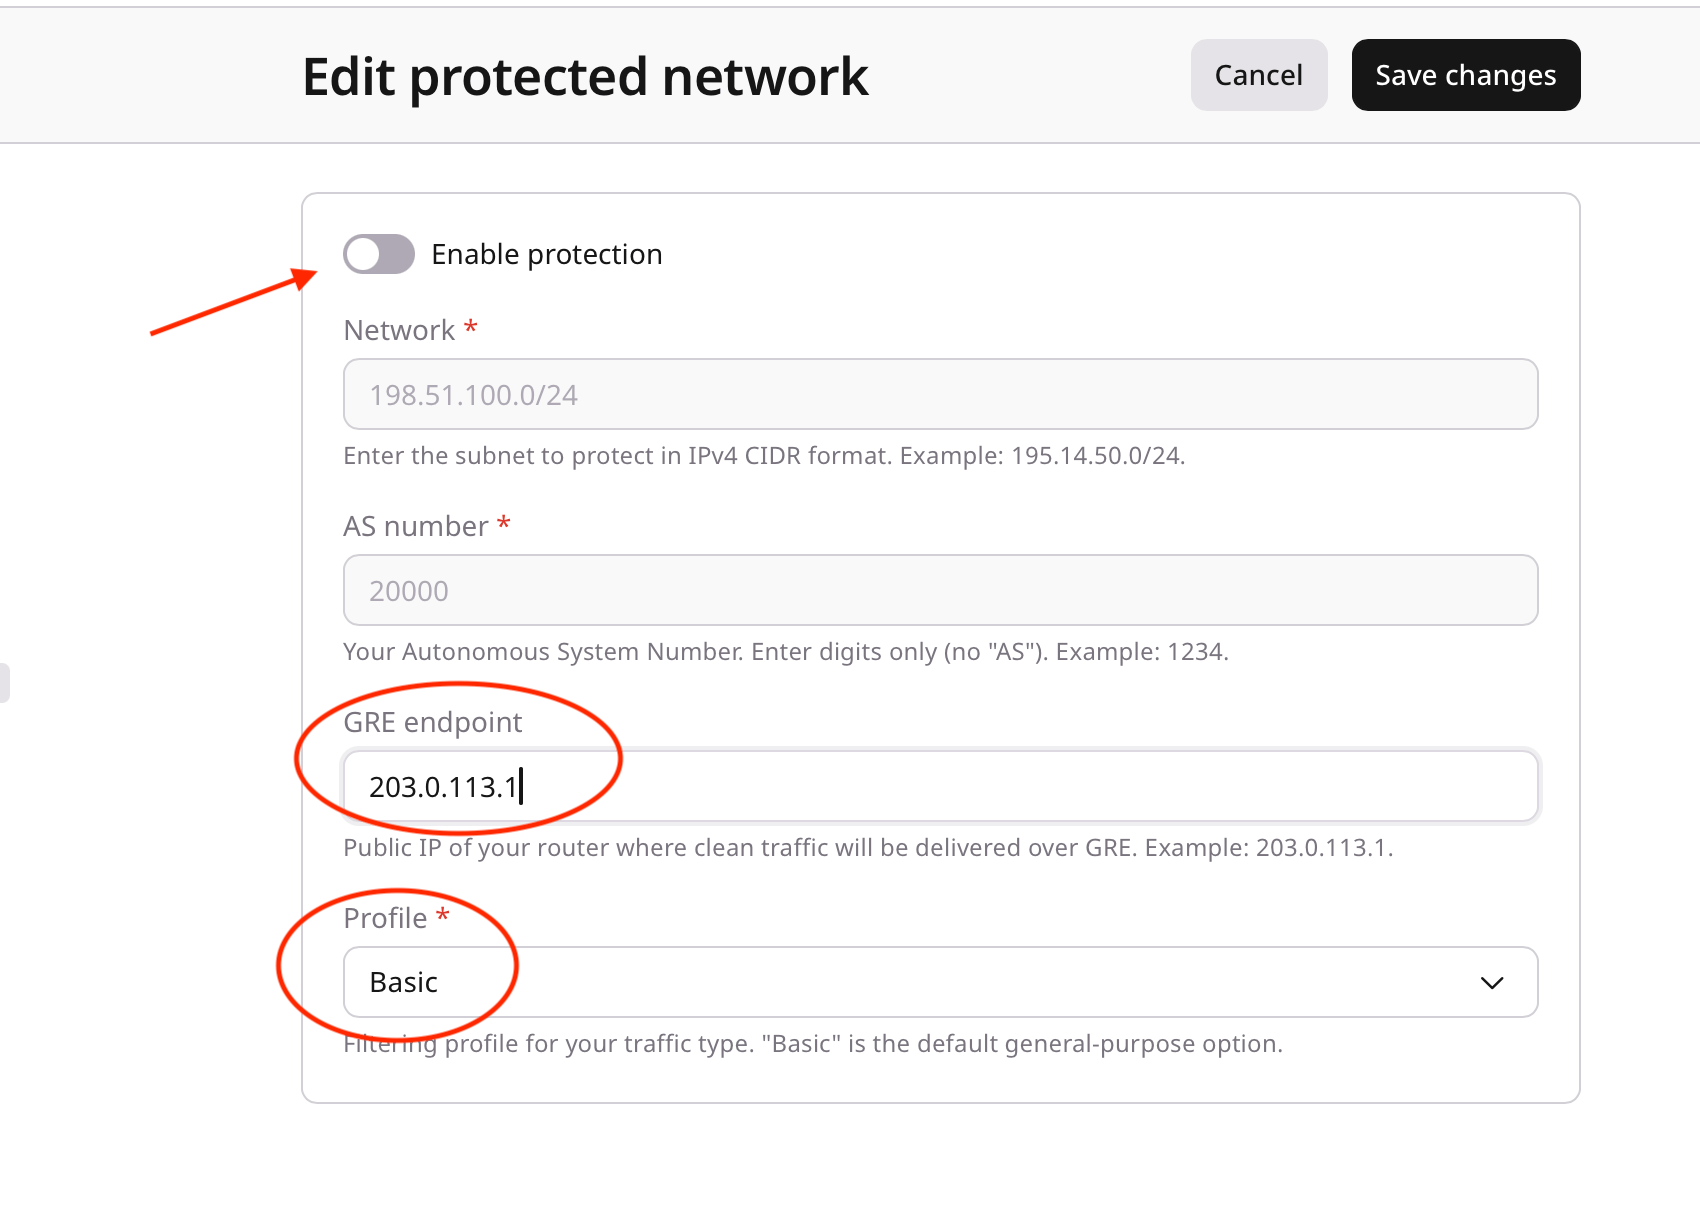
In the Edit protected network view, configure the following fields:
- GRE endpoint
- Enter the Generic Routing Encapsulation (GRE) endpoint IP address on the local router. This is the address Gcore uses to forward filtered traffic through the tunnel.
- Example:
203.0.113.1.
- Protection profile
- Select a protection profile from the dropdown list. Create custom profiles later if needed.
- GRE endpoint
-
Review the settings and click Save changes to apply them.
The default Basic profile is a network filtering profile, distinct from the free Basic protection mode described in About DDoS Protection. Changes to the protection profile take effect immediately and do not require a new network submission or NOC review.