

1
Create and populate the S3 bucket
- Log in to the AWS Management Console and open Amazon S3.
- Create a general purpose bucket and select its AWS Region.
-
Upload the objects to deliver through the CDN, including
index.htmland alogo.pngverification object.
2
Allow public website access
Account-level Block Public Access settings must permit public bucket policies. If those settings are centrally managed, contact the AWS account administrator before changing the bucket.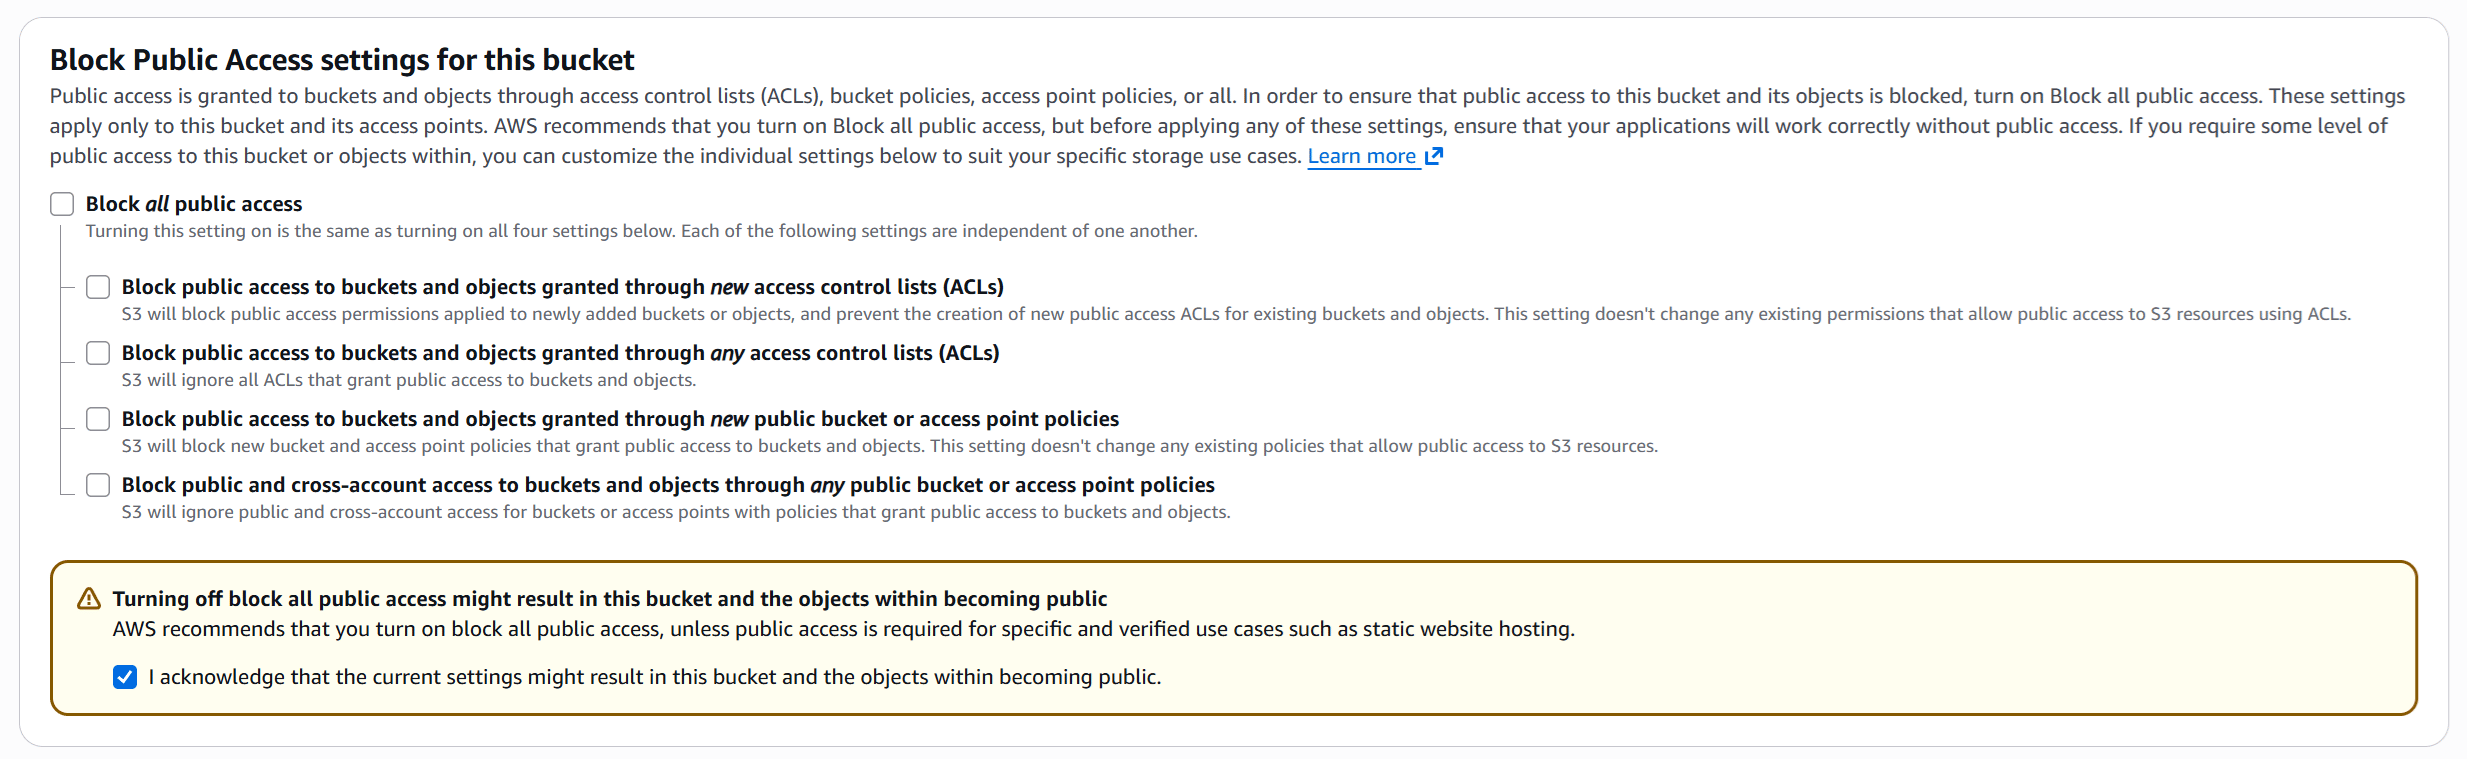
- Open the bucket and select Permissions.
- Under Block public access (bucket settings), click Edit.
- Clear Block all public access.
- Select I acknowledge that the current settings might result in this bucket and the objects within becoming public.
- Click Save changes, then confirm the change in the dialog.
3
Enable static website hosting
- Open the bucket’s Properties tab.
- Under Static website hosting, click Edit.
- Set Static website hosting to Enable.
- Set Hosting type to Host a static website.
-
In Index document, enter
index.htmlor the name of another uploaded default object.
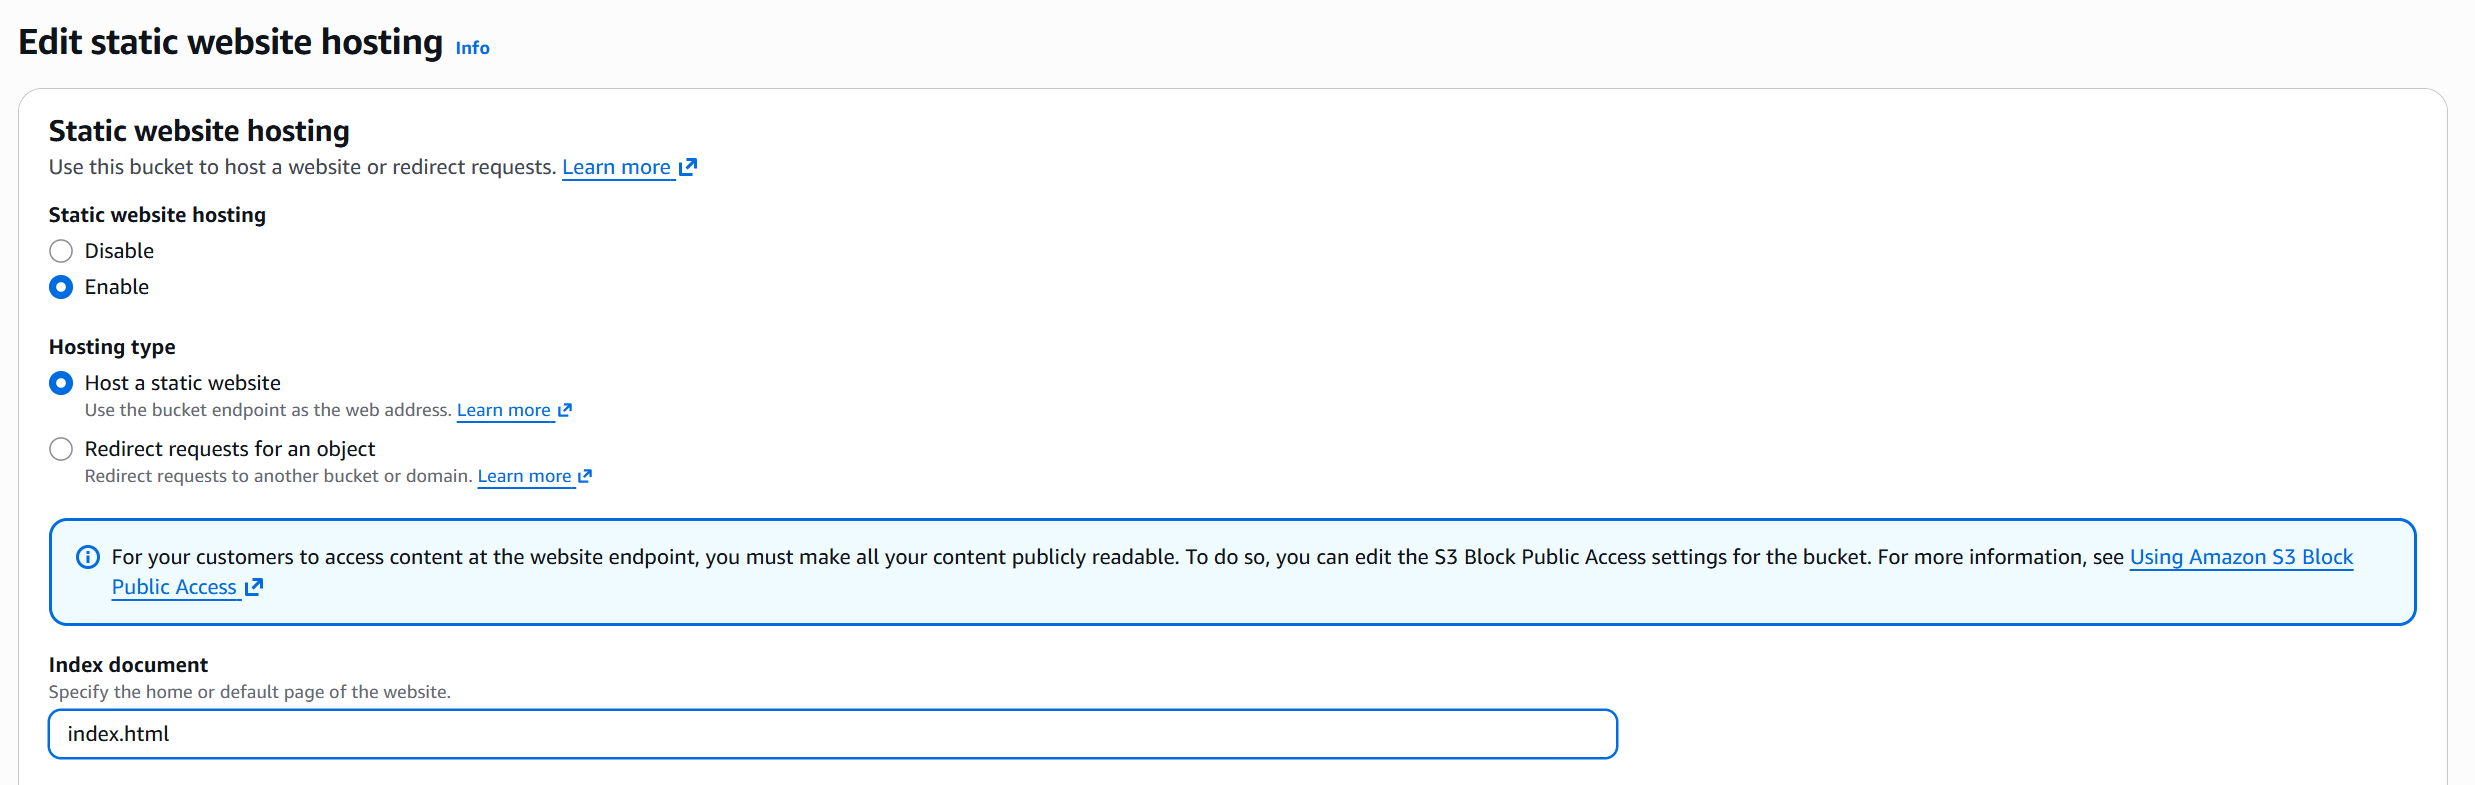
- Save the changes and copy the Bucket website endpoint.
4
Add a public-read bucket policy
On the Permissions tab, click Edit under Bucket policy. Replace Click Save changes.
example-bucket with the bucket name in this policy:5
Test the S3 website endpoint
Append
/logo.png to the HTTP website endpoint copied from AWS and open the resulting URL.Confirm that the object loads without a 403 or 404 response. Amazon S3 website endpoints support HTTP but not HTTPS.6
Create the CDN resource
- Log in to the Gcore Customer Portal and select CDN > CDN resources.
- Click Create CDN resource.
- In Add domain, enter the custom domain.
- In Origin, keep Specify content origin selected.
- Select URL.
- Select HTTP as the origin pull protocol.
-
In Origin source, enter the S3 website endpoint without
http://and without an object path. - Click Create.
7
Configure the custom domain
-
Configure the custom domain by pointing its CNAME record to the
*.gcdn.cohostname shown in the CDN resource’s Setup guide. - For HTTPS delivery, attach an SSL certificate to the custom domain.
8
Test delivery through the CDN
-
Open the verification object through the custom CDN domain:
- Confirm that the object loads.
- (Optional) Configure the application to use the CDN domain, then use the browser’s Network panel to confirm that asset requests use that domain. Creating a CDN resource does not rewrite asset URLs in HTML or application code.